
How to make a dollhouse needlepoint bolster cushion
ONLINE MINIATURE NEEDLEPOINT EMBROIDERY TUTORIALS
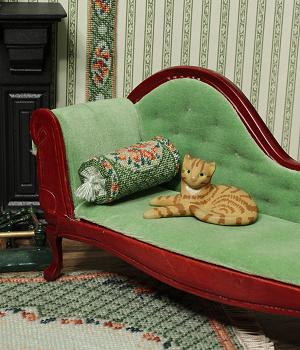
These doll’s house scale bolster cushions are designed to be simple to stitch and put together. Add some of these to your doll’s house or room setting for that elegant, homely touch.
The miniature bolster cushions are to be worked on 32 count silk gauze, so fine detail can be achieved without a very tiny count of silk gauze being used.

In addition to a piece of 32 count silk gauze, each kit contains a colour block chart to count the design from, a suitable needle, Anchor stranded cotton (use one strand), some wadding, and full instructions (including how to make the tiny tassel).
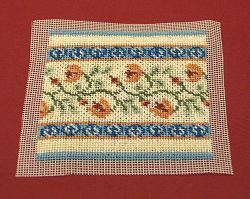
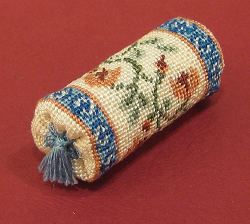
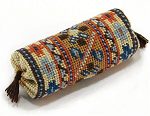
This tutorial features the ‘Eleanor’ doll’s house bolster cushion design, but there are several other designs to choose from in our Needlepoint Kit Store.
If you have never done miniature needlepoint before, start by reading the BASIC EQUIPMENT and NEEDLEPOINT STITCHES tutorials first, then come back to this page.
Before you begin stitching, you will need to make a card mount for the silk gauze. This will make it much easier to work on, and help to keep your stitch tension even. Cut a piece of stiff card 4 x 4 inches, with an aperture of 3 x 3 inches. Fix the silk gauze to the card with masking tape along all four edges, as tautly as possible. See the HOW TO MOUNT SILK GAUZE tutorial for details.
Identify the thread colours supplied in the kit using the colour key, then, using one strand of the Anchor stranded cotton, start the design in the centre, using tent stitch. Remember that one square on the chart equals one stitch, and always use a ‘stabbing’ motion, not a ‘sewing’ (scooping) one.
When the stitching is complete, if it has become slightly mis-shapen (especially if you did not use a card mount to hold the silk gauze taut), press it on the reverse side with a medium hot iron, over a padded ironing board, pulling the fabric gently if necessary to get it dead square.
Trim the finished stitching so that there is a margin of a quarter of an inch of unworked gauze all round.
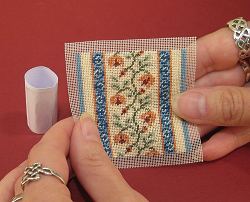
Cut the card template from the card piece supplied in the kit. Butt join the two short sides together, and secure with sticky tape.
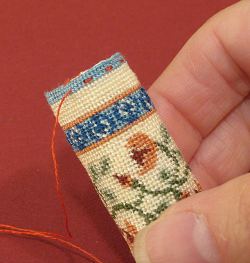
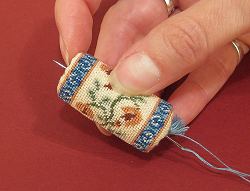
Hold the stitching in front of you, right side facing you, with the design oriented so that the bolster ends are at left and right as you look at the stitching, as in the picture.
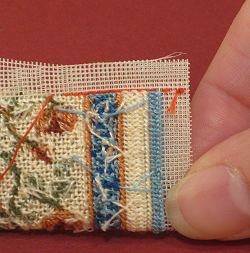
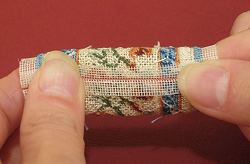
Fold the stitching in half lengthwise, right sides together, and backstitch all the way along the side seam, including the seam allowances at each end, using one strand of a leftover thread from the kit in a toning shade. NB In the tutorial photos, I have used a contrasting thread for clarity.
Open out the seam and flatten the seam allowances with your thumbnail,

– then trim the allowances to an eighth of an inch.
Turn the tube right side out.
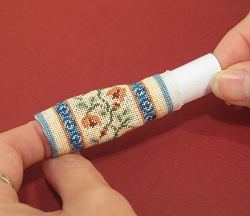
At one end, fold in the seam allowance, and crease it with your thumbnail. Then insert the card tube from the other end, centring it in the fabric tube. Now fold in and crease the other seam allowance.
With a one strand length of leftover thread in the shade that you stitched the very end of the bolster with, start with a good knot and then make running stitches through the last couple of rows of needlepoint at one end of the bolster (including the folded back seam allowance). Make your stitches about one eighth of an inch long. Don’t start at the seam, as it will make pulling up the thread more difficult.
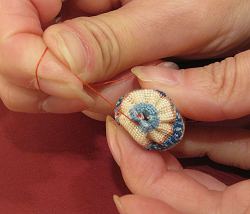
Then pull up the thread, gathering in the gauze, until the central hole is as small as you can make it.

Make one backstitch to secure the gathers and then make a few neat stitches back and forth across the centre to hold the gathers tightly in place, then fasten off with a good knot.
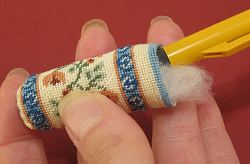
Stuff the tube lightly with pieces of the wadding, poking it down the tube with a pencil, then gather the other end of the bolster in the same way.

To make the tassel, select two strands of thread in one colour, from the threads left over from the main needlepoint stitching. Thread a long but sharp needle with one of the strands of thread, and put it to one side for now. Cut out the tassel template and, taking the second strand of thread, wind it around the card – about twelve turns will use up the one foot length. Leave the two ends hanging down below the card.
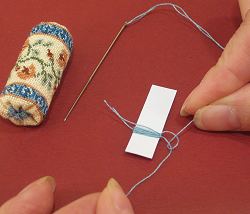
Take the threaded needle, and slide it under the bundle of twelve threads, making sure that the needle does not pierce any of the threads.
Leaving the needle threaded, tie the thread into a knot at the top edge of the card, gathering the wound threads up. Leave the thread end nearest the needle with at least six inches of thread available to use later.
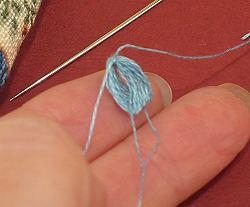
Slide the bundle of thread off the card, and smooth down the three loose ends with the loop of twelve threads.
Holding the bundle securely in one hand, about an eighth of an inch from the knot at the top, wrap the thread with the needle still attached around the bundle twice, as close to your thumbnail as you can get.
Hold these two wraps in place with your index finger.
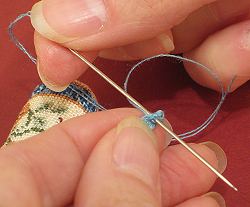
Poke the needle through the bundle, once below and then once above the wraps to secure.

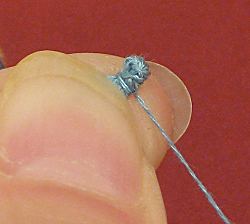
Then, poke the needle up through the wraps and out the top of the bundle, as near to the knot as you can
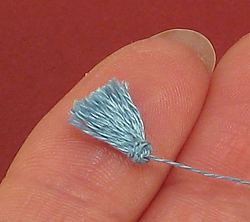
With a sharp pair of scissors, trim the bottom edge of the bundle of threads, to complete the tassel. Slightly curving the line from side to side makes a more realistic tassel than cutting the threads straight across.
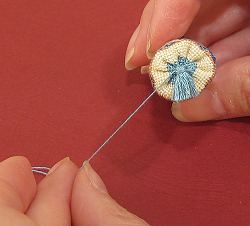
Positioning the needle exactly in the centre of the gathers at one end of the bolster, pull the thread up snugly and make a tiny back stitch to attach the tassel.
Then poke the needle all the way through the bolster to the opposite end. Pull up the thread quite tightly, to ‘pull in’ the gathered end with the tassel. Make two tiny backstitches to secure the thread, then cut the thread as short as you can.
Repeat to make and attach the tassel at the other end of the bolster cushion.
Your bolster cushion is now complete, and ready to display in your dolls’ house!
Go to the ONLINE SHOP now, to see the full range of miniature bolster cushion designs which you can choose from.
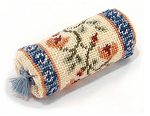
Anthea
Eleanor
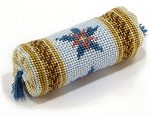
Judith
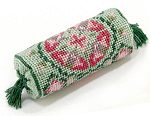
Tansy